What is auto checkout?:
Once you are logged in to SkyVisitor, you can configure auto checkout settings for each different visitor type. These settings help you maintain an accurate record of who is on site and support both safety and compliance by automatically checking visitors out who have failed to physically check out by the expected time.
This can be the end of their specific visit, at a fixed time of day, or X hours after check in.
These settings can be applied separately per visitor type, per location.
There is a further option to Notify when this occurs. This notification is via email to the email addresses associated with the Host(s) of the Visit.
---
When you might want to use and NOT want to use this feature:
In busy city buildings, particularly where badges are not issued, visitors are less likely to return to reception to check out when they leave. In these environments, evacuation procedures often rely on a building sweep rather than a roll call. If visitors remain marked as Checked In after leaving, this can distort your on-site records and reporting. For this reason, many buildings enable 'Auto Checkout' to help clear down the visitor list for the following day.
However, in some buildings, contractors may work outside standard hours and require flexible access times. In these cases, you may choose to disable this setting. It may create a safeguarding risk for contractors working out of hours or overnight. For example, a contractor could still be on site but may have been automatically checked out of the system. In the event of a fire or other emergency, a review of SkyVisitor would incorrectly indicate that they had left the premises, meaning their presence on site may not be accounted for.
---
When is best to 'Notify' and what does this mean?:
Use Notify when a visitor or contractor has not checked out by the expected time and follow-up may be needed. For example, you may need to confirm they have left safely, extend their access, or mark them as non-compliant if they left without checking out. This can also help you confirm whether they still have any site items, such as keys or access cards.
When Notify is enabled, an email is sent to the host or hosts for that visit, provided they have a valid email address and have not blocked notifications. For guidance on whitelisting emails so you can receive notifications, see this article: Whitelisting in your email - I'm not receiving email notifications from SKYVISITOR.
Precaution: Please measure the impact of this setting before applying it. If you have Notify ticked and have all your visitors auto-checkout at the 'end of the day' (e.g. 23:45 then your hosts will recieve alerts at this time, and it may not be convenient for them to do so.
Reports
SkyVisitor can generate a report of 'Auto-Checked-Out' Visitors. You can access this if you wish to know who wasn't compliant. You will also be able to see it on any User's Visit Events.
---
How to apply the setting:
To change the auto checkout settings, log in with an account that has the correct permissions.If you do not have these, please contact your administator or our help desk team to request them.
Then follow the below steps:
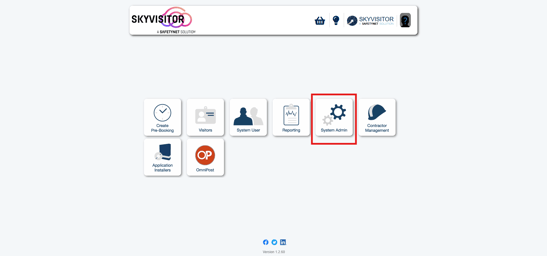
1. Click 'System Admin'.
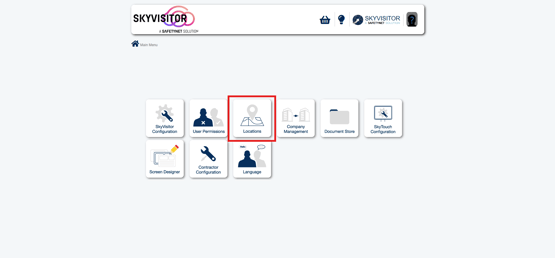
2. Click 'Locations'.
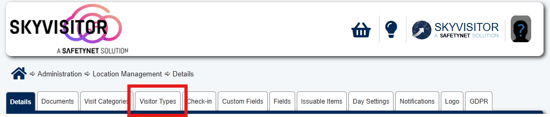
3. Select 'Visitor Types'.
4. Choose the relevant location.
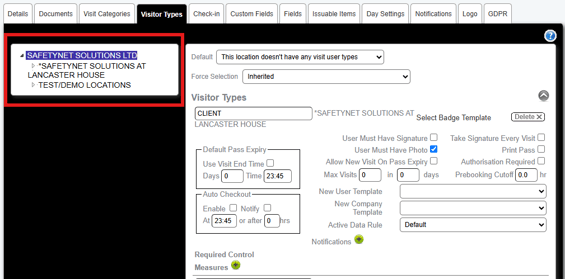
5. Find the ‘Visitor Type’ you want to update, such as Visitor or Contractor.
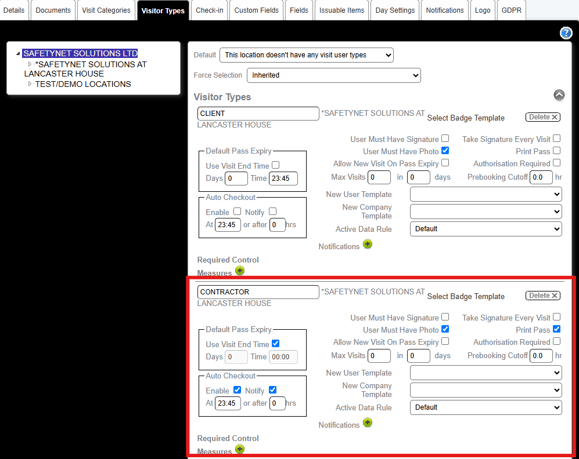
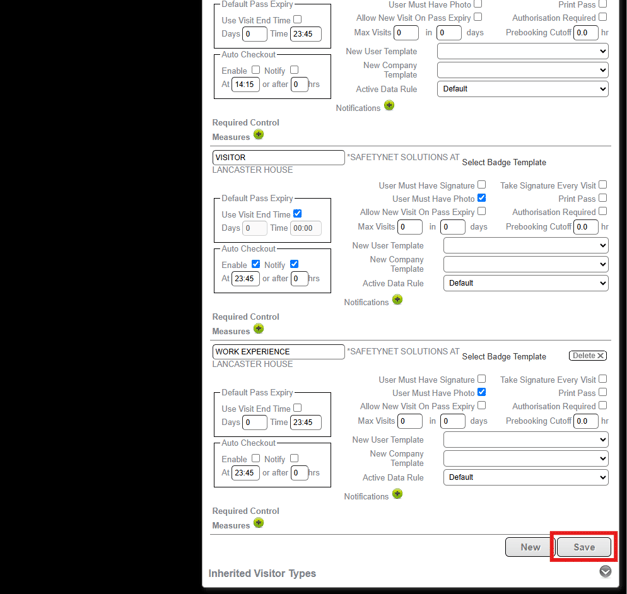
6. Tick ‘Enable’ to turn on auto checkout.

7. Tick ‘Notify’ if you want the host to be notified via email.

8. Scroll down and click ‘Save’ to apply your changes.