HARDWARE
The printer setup for the MCL32CI is very similar to the setup process for the TSP-700ii, with a few changes over the latter. The main changes to the setup of the printer are physical, given the few design changes noted over the previous model.
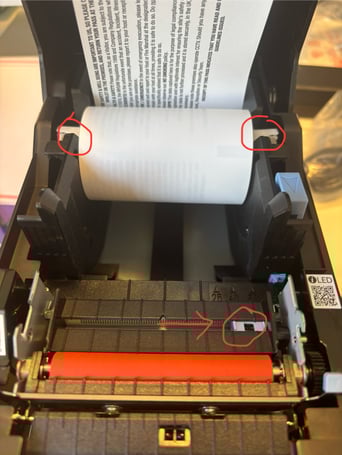
The first notable change is the paper is fed over the top of the roll, instead of from underneath, with the blank side of the roll facing upwards.
Secondly, the roll also needs to be held in place by the white prongs in the image. The paper can be put into place by lifting roll into place from below the prongs. Placing the roll at the base of the printer, like the previous model will instead display a paper error.
Finally, the black mark sensor on the MCL32 can be moved along to wherever the black mark on the pass resides. For the purpose of our standard thermal passes, the sensor needs to be positioned to the right side, as demonstrated in the above image.
_____________________________________________________________________________
SOFTWARE & DRIVERS
Once the printer is turned on and connected, install the Star Printer Drivers and load the Star Micronics Printer Utility. They can be downloaded from TEAMS here: https://safetynetsolutions.sharepoint.com/:f:/s/SShhhhhhhh/EvEnDm03sKhEt5nWlI4gPGABbVC7tvNjp4sDyZjEK_d_HQ?e=7XRvWm
This setup folder also includes an 'MCL32CI Config.json' file which will be needed later on in the process.
You will need to download the entire folders contents and run the 'Setup' file inside the setup folder, selecting '
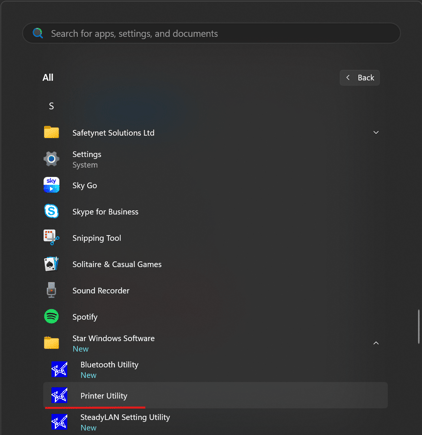
Now installed, the utility can be found via Start (Windows Icon) -> ALL -> Scroll down to S -> Star Windows Software -> Printer Utility
Once loaded, select the MCL32 option and click Next in the bottom right.
When the next page opens, ensure USB or Ethernet is selected, based on the connection type you are using.
If connecting over Ethernet, there will be an additional step of 'Search Network' and selecting the printer's corresponding IP address.
Then click Done, and OK on the next page - The printer is now added to the Printer Utility.
If connected via Ethernet, you will also need to click on Windows Print Queue Management and click Add for the Ethernet printer to display in the Printers & Devices panel in windows, which will be required later on. USB connections are already added by default.
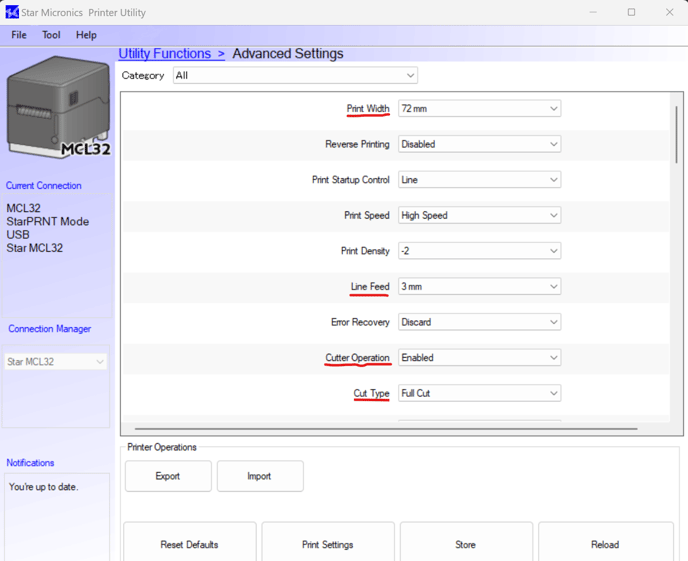
Once completed, navigate to Utility Functions -> Advanced Settings, which will load the currently stored onboard printer settings. At this stage, I would suggest selecting the IMPORT option and using the pre-configured 'MCL32CI Config.json' save file. It can be found in the Setup folder provided at the start of the software section.
If you do not have access to the file - You will need to change the following settings and values:
| Setting | Value |
| Print Width | 72mm |
| Line Feed | 3mm |
| Cutter Operation | Enabled |
| Cut Type | Full Cut |
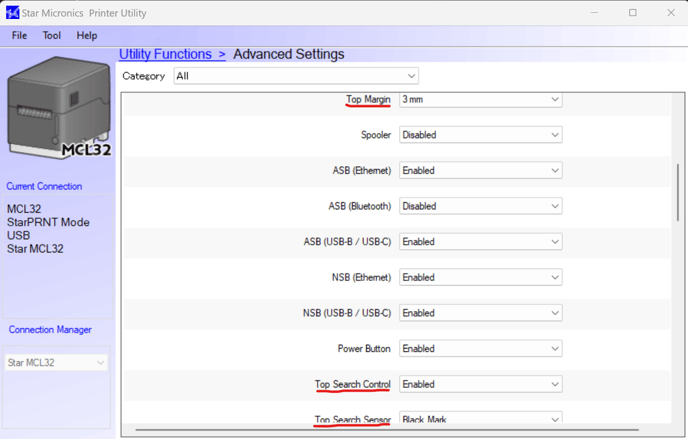
| Top Margin | 3mm |
| Top Search Control | Enabled |
| Top Search Sensor | Black Mark |
| Operation at Power On | Keep |
| Operation at Cover Close | Feed Cut |
| Internantional Character | UK |
Ensure you click STORE once all settings are changed.
A visual breakdown of the amended settings can also be found below:
 Now you have applied the onboard settings to the Star Printer, you can close the Printer Utility.
You will now need to set the print settings for the windows driver.
Navigate to the Control Panel -> Devices & Printers, right-click the MCL32 Printer and click 'Printer Properties'.
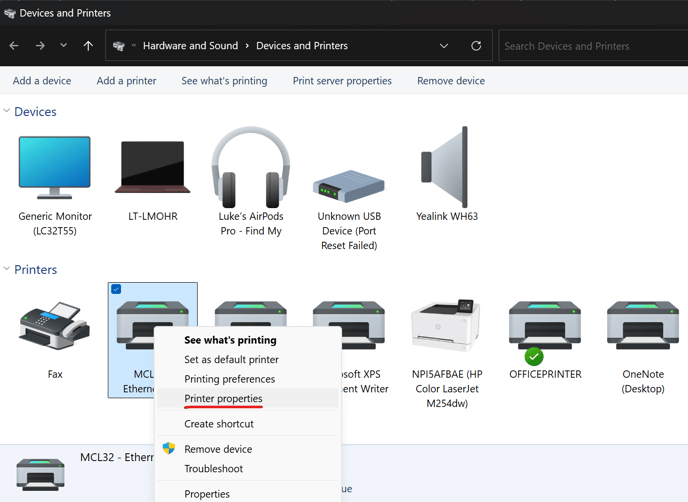
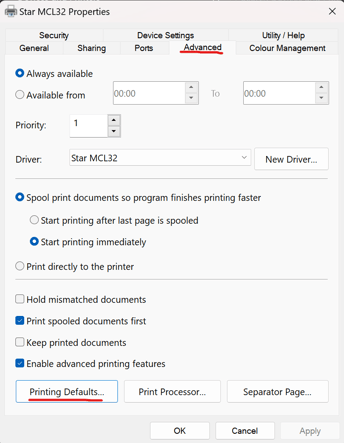
When the window opens, click on the ADVANCED tab, and click on 'Printing Defaults' at the bottom…
On the Layout tab, ensure Orientation is set to Landscape. In the Paper/Quality tab, ensure Paper source is set to FRICTION.
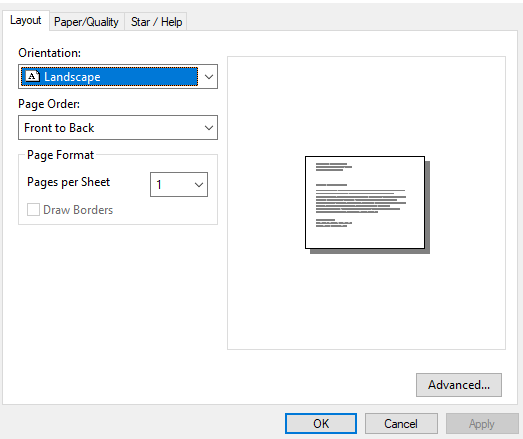
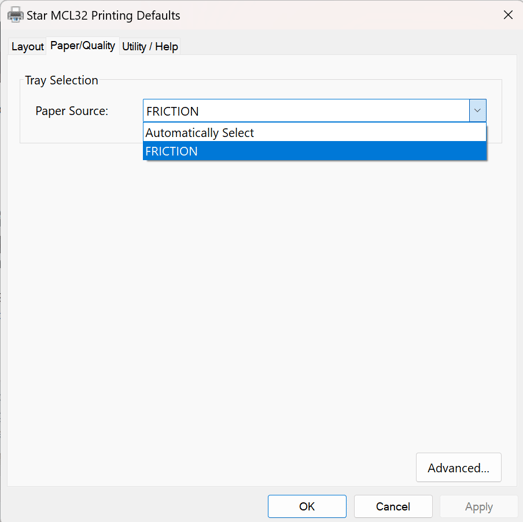
Apply & OK
Above the Advanced tab, you will see a 'Device Settings' section. Inside of the device settings, you will need to amend a couple of Paper Cut options.
Click the '+' symbol next to the Paper Cut section and change both settings to FULL CUT
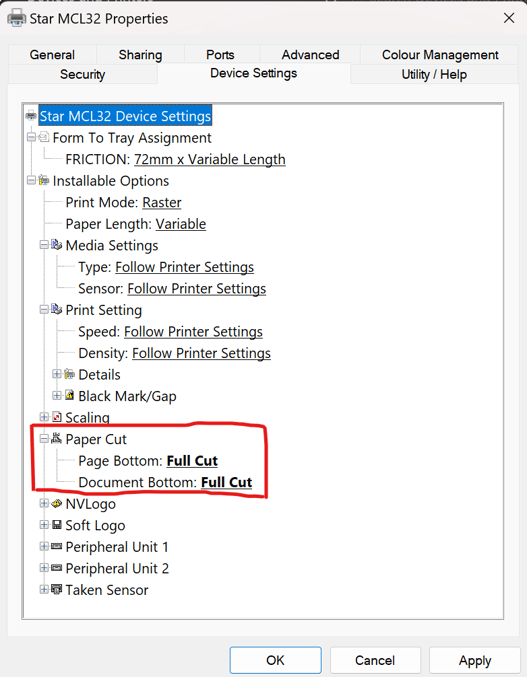
Once amended, click Apply.
Now that the printer is fully setup, you will need to select the printer for use in SkyVisitor. You can do this by loading up the application, making your way into Settings -> Peripherals
I would recommend selecting the printer as both Badge and Thermal printer options.
You should now be ready to print a pass and test everything is working as expected!