Part 1
Step 1 - Download the scanner utility and install it (You will need to sign up): Download Link
Step 2 - Open the scanner utility
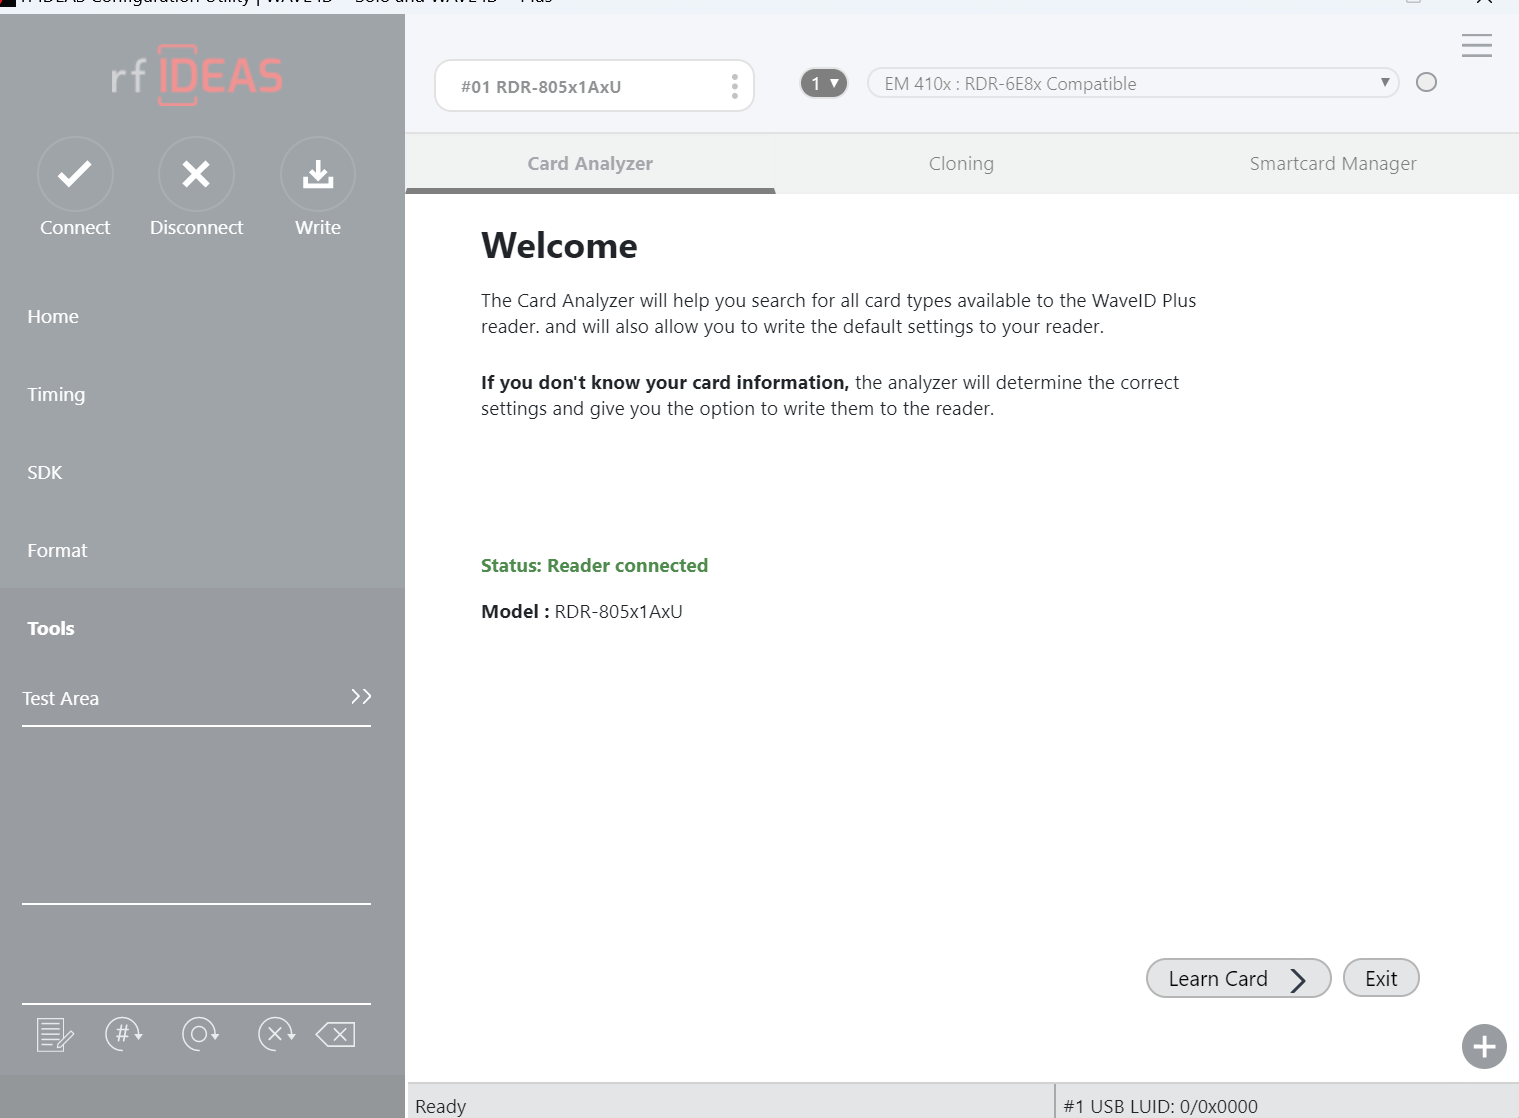
Step 3 - With the RF ID reader plugged into the PC, Press Connect in the top left.
Step 4 - Go to the tools section of the Scanner Utility and click "Start".
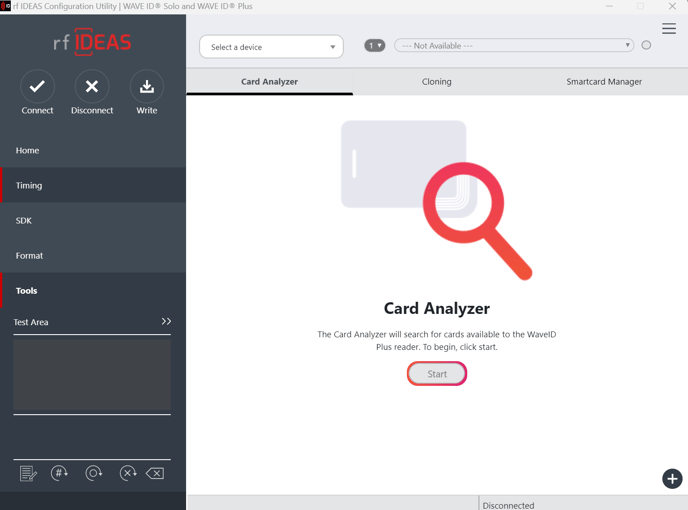
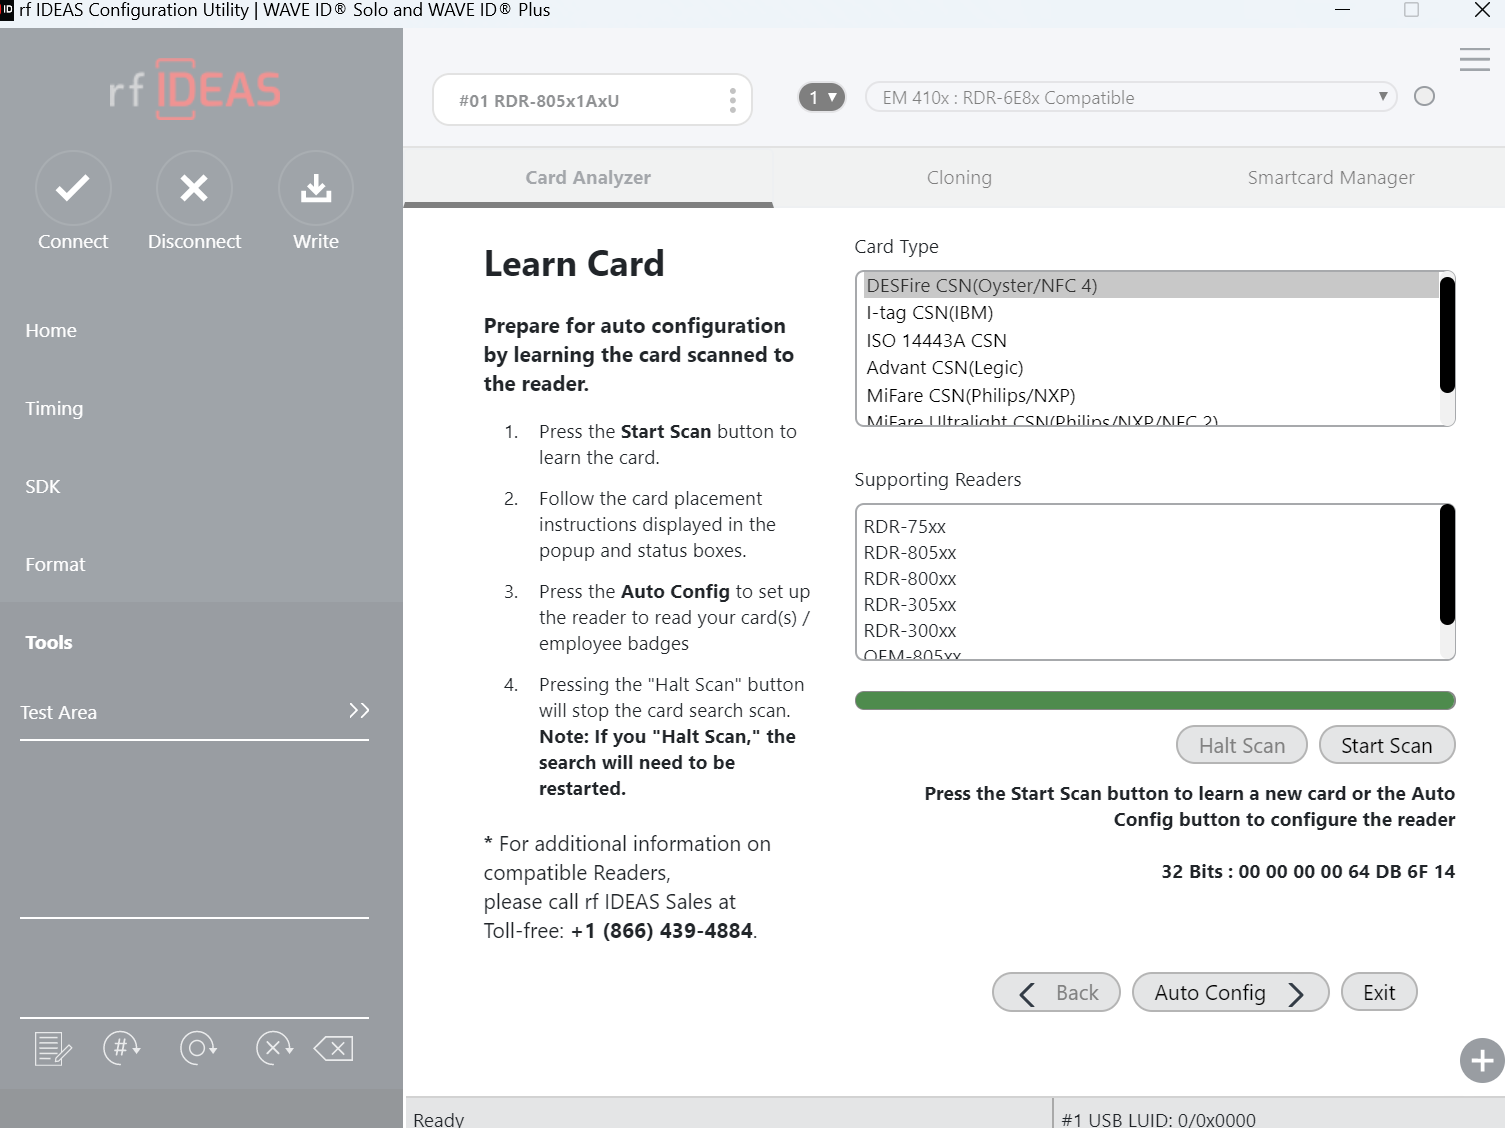
Step 5 - Select "Learn card"
Step 6 - Select "Start Scan" and follow the onscreen directions.
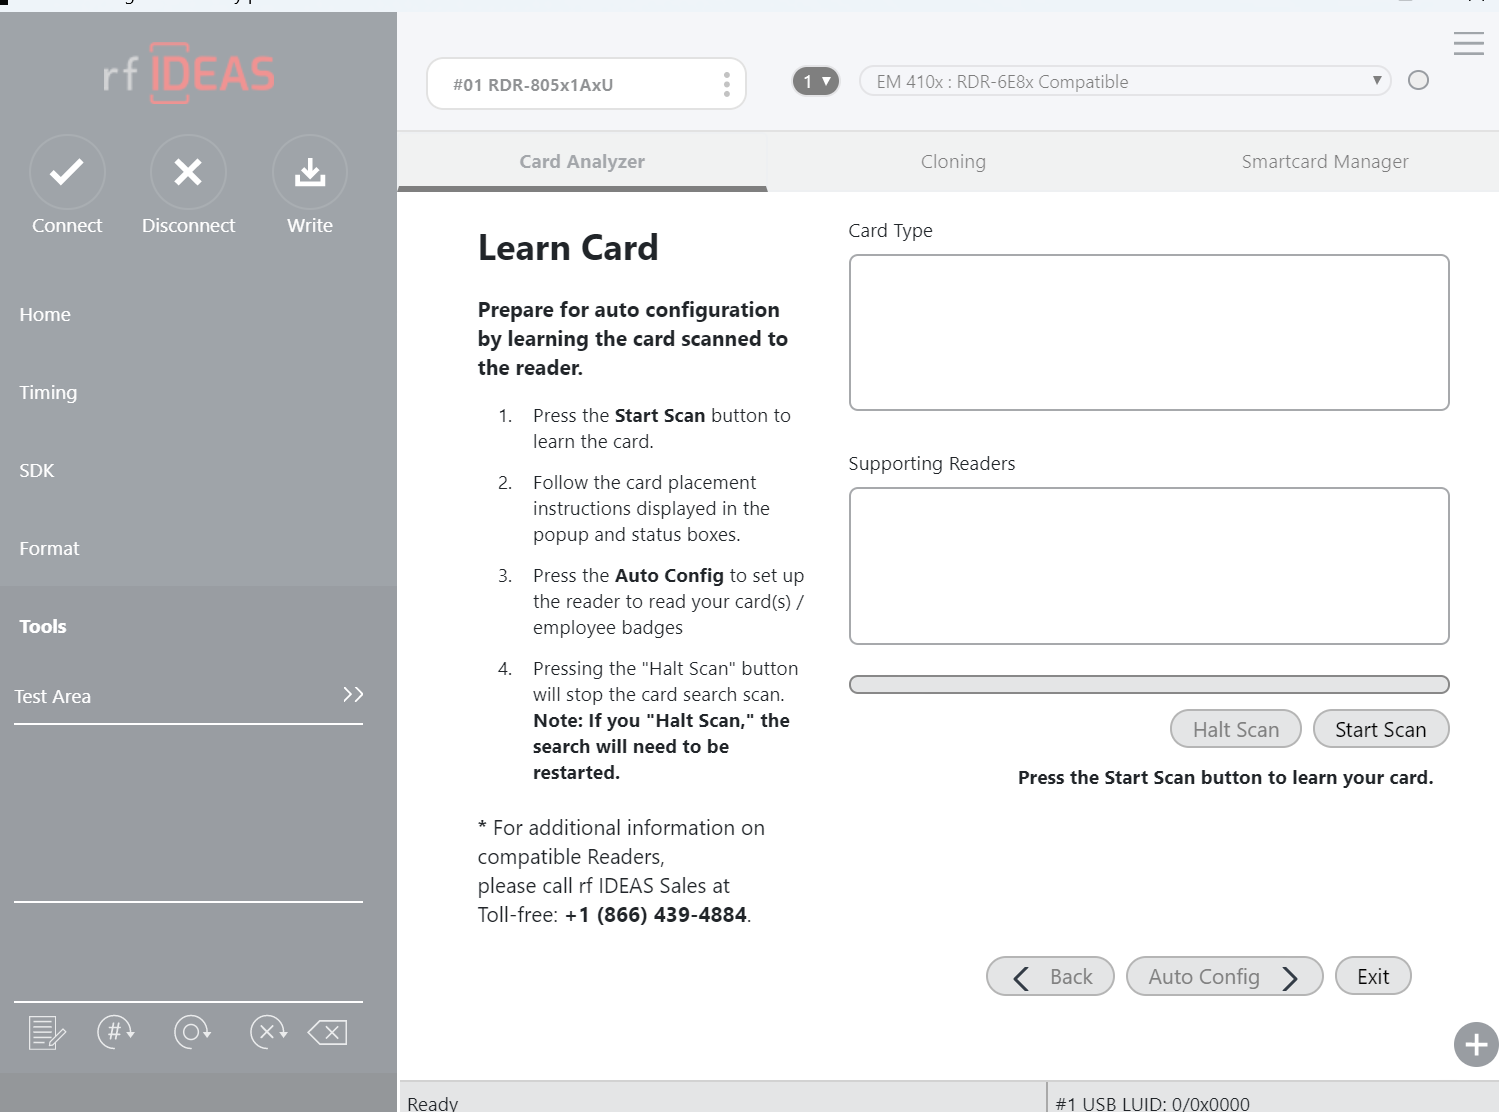
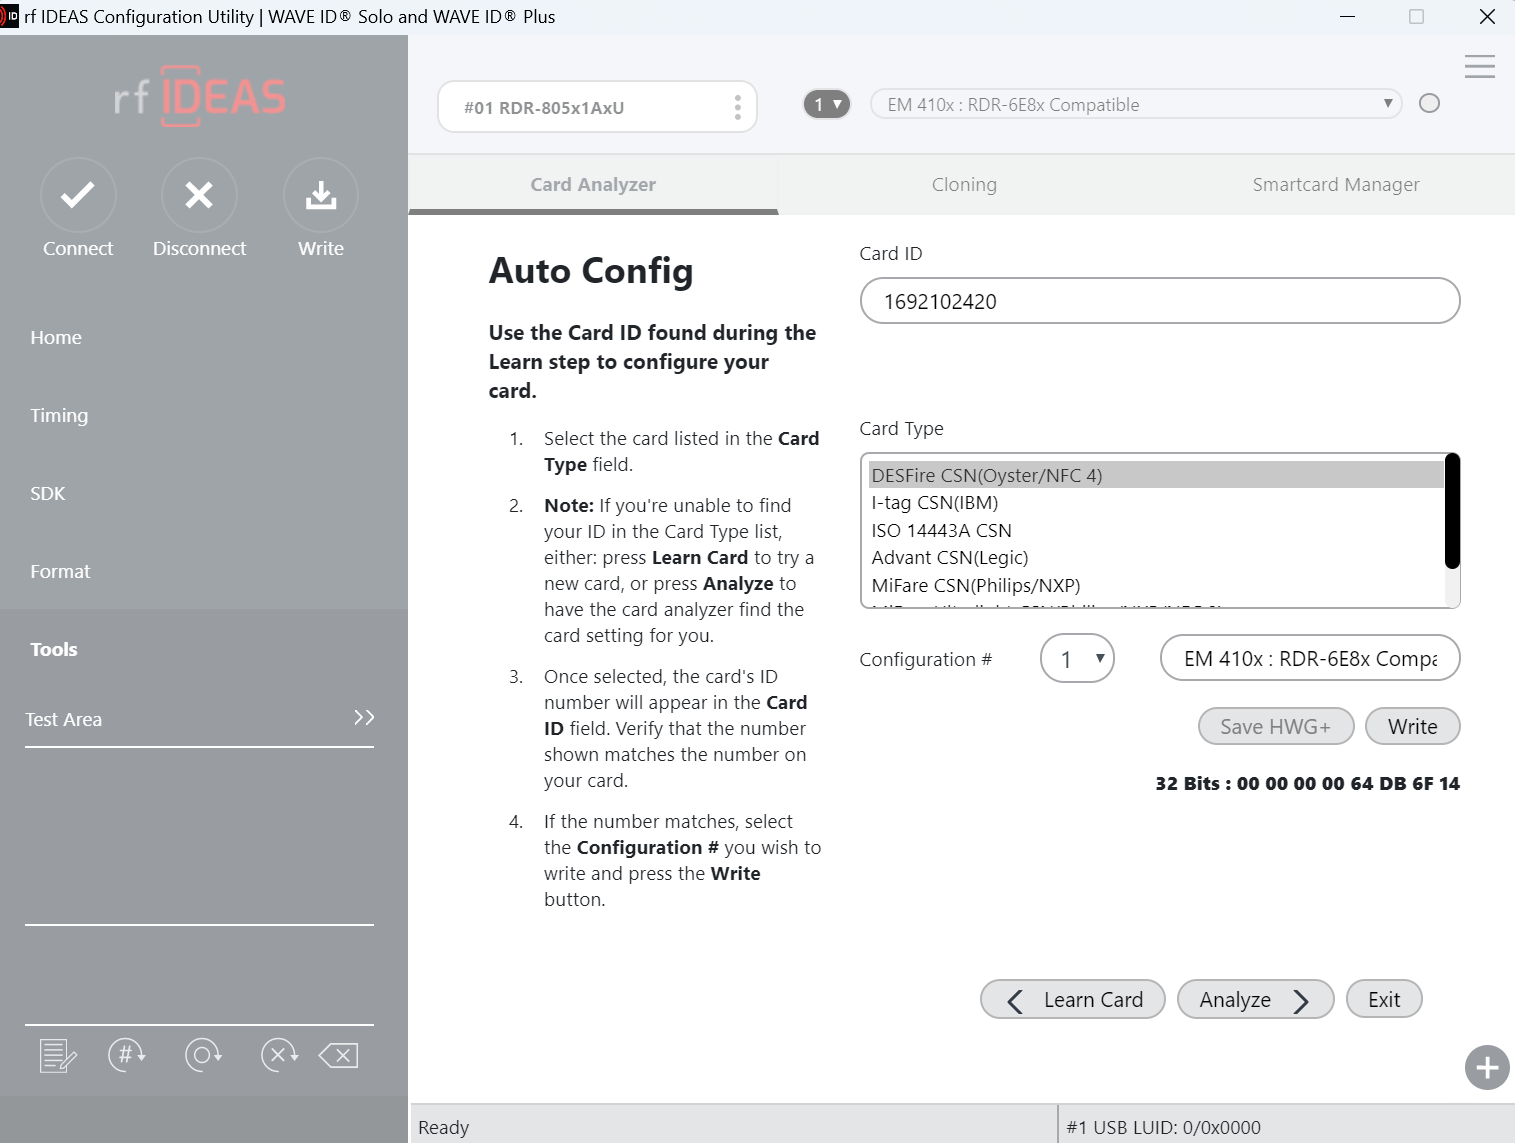
Step 7 - When the scan is complete select "Auto config" at the bottom right of the page.
Step 8 - Select the correct card type from the list of recommended profiles and then select "Write" making sure to follow the on screen instruction to remove the card from the reader. IF you do not know which is the correct card type then you will have to go through each card type until it works and then make a note of it for future reference.
Step 9 - Press "Exit" in the bottom right of the page making sure to select "NO" when asked if you want to keep the original configuration.

Step 10 - On the top left of the screen select "Disconnect" and then "Connect" to check that the configuration is saved on the reader. So long as the reader comes up with the same configuration that was set up the process was successful.
The RF ID Reader is now set up
Part 2 - RF ID reader set up on SkyTouch
Step 1 - Plug in RF ID reader to PC or tablet USB hub. (Reader should make a noise)
Step 2 - Open SkyTouch and sign in
Step 3 - Go into the settings menu by pressing the top right then left of screen consecutively to open up the menu and then select settings.
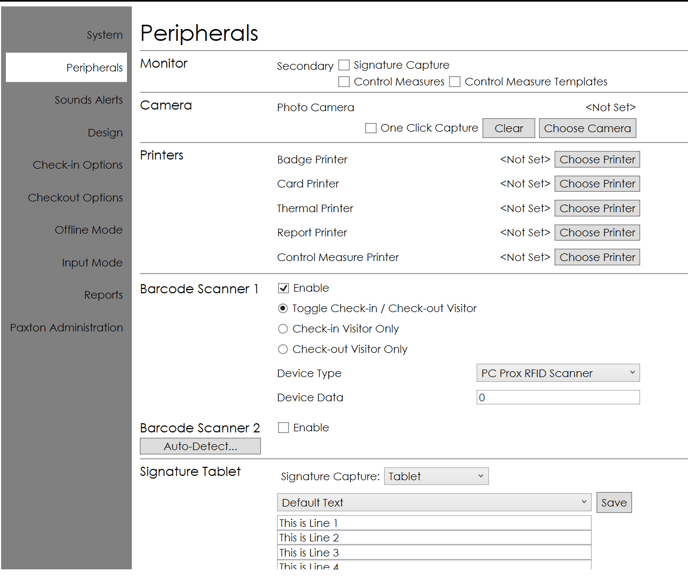
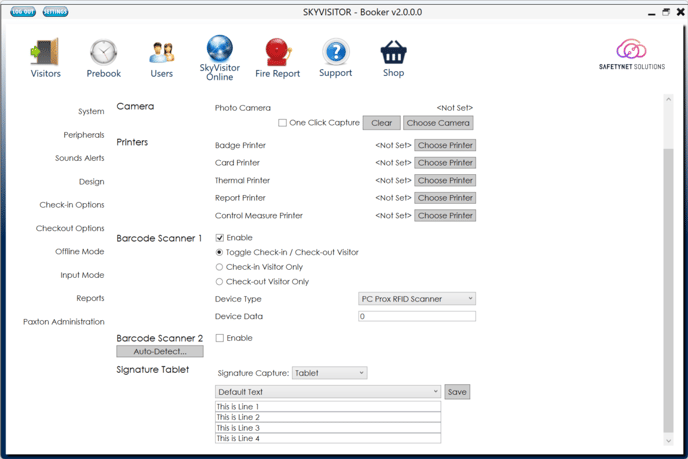
Step 4 - In settings select the peripherals tab on the left side.
Step 5 - Enable the barcode Scanner and in the drop down device type menu select "PC Prox RFID Scanner"
Step 6 - Close and reopen SkyTouch application
Part 3 - RF ID reader Set up on Booker Application
Step 1 - Plug in RF ID reader to PC or tablet USB hub. (Reader should make a noise)
Step 2 - Open the Booker Application and sign in
Step 3 - Go into the settings menu by pressing the settings button in the very top left of the screen.
Step 4 - In settings select the peripherals tab on the left side.
Step 5 - Enable the barcode Scanner and in the drop down device type menu select "PC Prox RFID Scanner"
Step 6 - Restart the Booker Application for changes to take effect.
Part 4 -Linking issuable items
Step 1 - Open the Booker Application
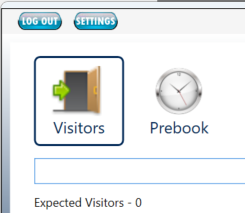
Step 2 - Select any user and begin the check in process by pressing the door with a green arrow icon.

Step 3 - on the check in box select the green plus icon next to issue item.
![]()
Step 4 - In the issue item box select the "select item button"
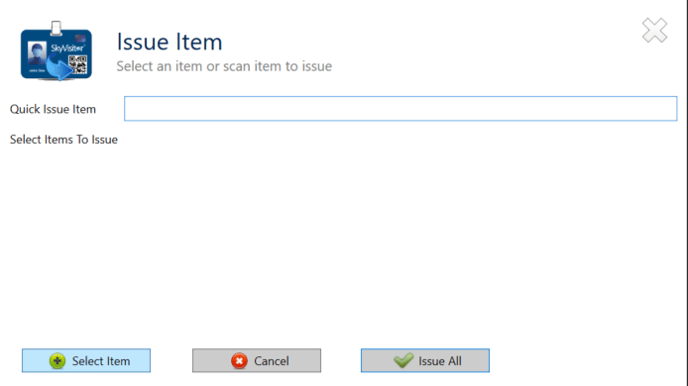
Step 5 - Select the item you want to link
Step 6 - While the item is selected scan the card using the RF ID reader, the system will prompt to make sure you want to link the item.
Step 7 - The item is now linked to the card that was scanned.
Note: When linking multiple items make sure to DESELECT the previous item before selecting the next one.
Below is a video showing the scanning characteristics of the RFID reader to check in and out a user with a non returnable issuable item, linked to the card used. Note that the card must be held against the reader for ensure a guaranteed check in.