Please follow these steps to set up your Star TSP700II Thermal Printer using USB Connection, if you have an ETHERNET/NETWORKED printer please refer to [LINK].
STEP 1
Once the printer is turned on and connected to the PC, you will need to download the Star Micronics Printer Utility using this link [LINK]. If you are unable to download this application it may be that you will need ADMIN credentials.
Once installed please load the PRNT Star Micronics Printer Utility application. Once loaded, select the TSP700II option and ensure Star line mode is selected, and click 'next'.

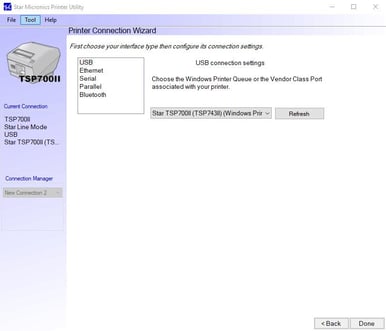
STEP 2
Once the next page of the wizard opens, ensure USB is selected, then click Done, and OK on the next page. Once completed the printer is now connected to the Printer Utility.
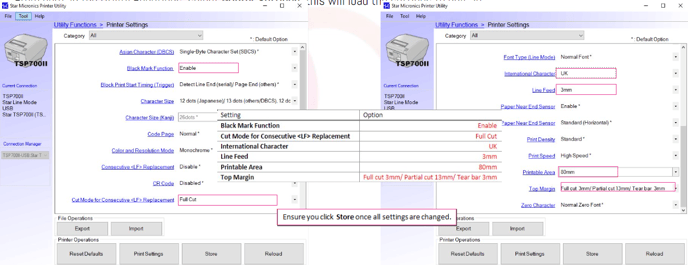
STEP 3
From here, in the Utility Functions, select Printer Settings, this will load the settings to edit. In here, change the following settings using the table below:
STEP 4
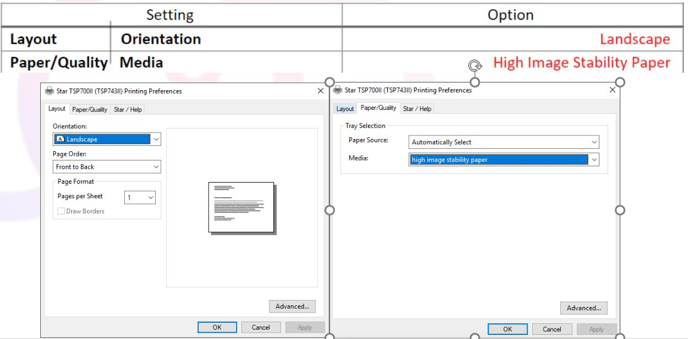
Once you have stored the settings to the Star Printer, you can close the Printer Utility. Once closed, you can open the Control Panel, and Right Click the Star TSP700II Printer, then click Printer Properties. In here, Select the ADVANCED, at the bottom, click PRINTING DEFAULTS, in here, change the following settings:
In the Layout tab, ensure Orientation is set to Landscape. In the Paper/Quality tab, ensure Media is set to High image stability paper.
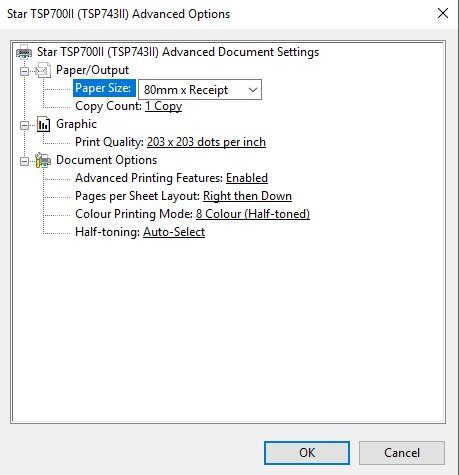
STEP 5
Once these are set, apply them, and click Advanced at the bottom right of the menu. In here, ensure Paper Size is set to 80mm x Receipt.
STEP 6
Finally, in the Printer Properties, click on the Device Settings tab, then change some of the settings to the following:
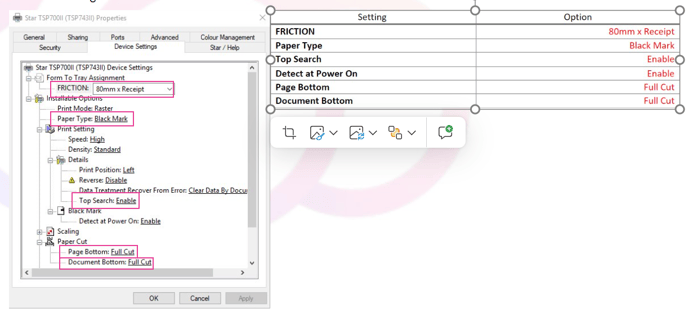
Once this has been completed, click APPLY
You will need to add the printer into your peripherals settings in the SKYVISITOR applications and test.